Mastering the Use of Photo Camera with Lens 3d 11 for Professional Digital Projects
In the fast-paced world of digital content creation, the quality of your visual assets can make or break a project. Whether you are designing a website, crafting a social media campaign, or developing educational materials, having access to high-resolution, versatile graphics is essential. This is where specific assets like the Photo Camera with Lens 3d 11 come into play. However, many creators overlook the technical nuances of integrating such 3D vector icons and high-resolution PNGs into their workflows. Understanding not just what this file is, but how to use it correctly, can save you time, prevent pixelation issues, and elevate the overall professionalism of your brand.
Understanding the Asset: More Than Just an Icon
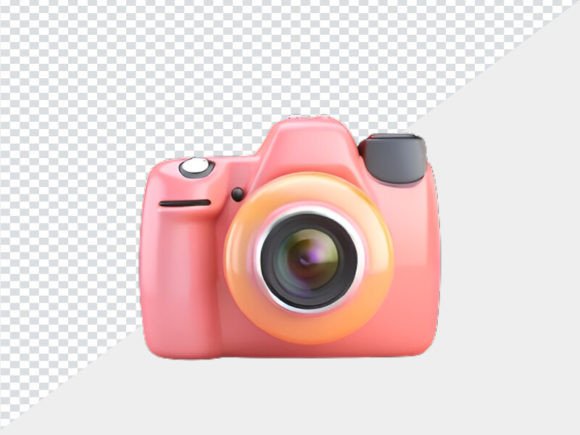
The Photo Camera with Lens 3d 11 is not merely a static image; it is a carefully rendered digital asset designed for versatility. Typically provided as a high-resolution PNG at 300 DPI, this file offers clarity that standard web graphics often lack. The "3D" aspect implies depth, shading, and realistic lighting effects that flat icons simply cannot achieve. For marketers and bloggers, this means the icon can serve as a focal point in hero sections, app interfaces, or printed brochures without losing its crisp edges.
When you download this asset, you are receiving a file that is significantly larger and of much higher quality than the preview samples often shown on marketplace listings. This distinction is crucial. Many beginners mistakenly assume that the thumbnail represents the final usable size, leading to disappointment when they attempt to scale it up for large-format printing or high-definition displays. Recognizing that the delivered zip file contains superior, watermark-free images is the first step toward leveraging this tool effectively.
Common Mistakes in Selecting and Using 3D Camera Icons
Even experienced designers can stumble when incorporating pre-made 3D assets into their projects. Here are some frequent pitfalls and how to avoid them.
Ignoring Resolution Requirements for Print vs. Web
One of the most common errors is using a graphic optimized for web (72 DPI) in a print context. While the Photo Camera with Lens 3d 11 is provided at 300 DPI, users sometimes compress or resize the image incorrectly before placement. If you are creating business cards, flyers, or packaging, maintaining that 300 DPI integrity is non-negotiable. Resizing the image down is generally safe, but stretching it beyond its original dimensions will result in blurriness and artifacting. Always check the actual pixel dimensions of the downloaded PNG before placing it into your design software.
Overlooking Transparency and Background Compatibility
PNG files are prized for their transparency support, allowing the icon to sit seamlessly over various backgrounds. However, a frequent oversight is failing to check how the 3D shadows and highlights interact with the new background color. A camera icon rendered with a light source from the top-left may look unnatural if placed on a dark background without proper adjustment. Designers should ensure that the lighting direction of the 3D element matches the rest of the composition. If the asset feels disjointed, consider adding subtle drop shadows or adjusting the brightness and contrast to harmonize it with your layout.
Neglecting File Organization and Licensing
When you receive an instant download in a zip file, it is tempting to extract the images directly into your project folder without reviewing the contents. This can lead to confusion later, especially if you have multiple versions or similar assets. Take a moment to organize your downloads. Create a dedicated folder for your stock assets. Furthermore, while these files are typically royalty-free for personal and commercial use, always double-check the specific license terms provided by the creator. Misunderstanding usage rights can lead to legal complications down the line, particularly for entrepreneurs and small business owners scaling their operations.
Practical Advice for Maximizing Quality and Efficiency
To get the most out of your Photo Camera with Lens and Button 3d Vector Icon, adopt a structured approach to integration. Start by evaluating the context in which the icon will be used. Is it a decorative element, or does it serve a functional purpose, such as a button for a photography portfolio? If it is functional, ensure that the clickable area is clearly defined and that the 3D details do not distract from the user experience.
For educators and content creators, consistency is key. If you use this camera icon in a series of tutorials or presentations, maintain consistent sizing and positioning across all slides or pages. This creates a cohesive visual language that helps your audience navigate your content more easily. Avoid mixing this high-quality 3D render with low-resolution clip art, as the disparity in quality will be immediately noticeable and can undermine the perceived value of your work.
Additionally, consider the file size implications. High-resolution PNGs can be large. For web use, it is often wise to create optimized versions of the image using tools that compress the file without significant quality loss. This ensures faster loading times for your website visitors, which is critical for SEO and user retention. However, always keep the original 300 DPI master file archived for any future print needs.
What to Check Before Finalizing Your Decision
Before you commit to using this asset in a major campaign, perform a quick audit. Zoom in to 100% on your screen to inspect the edges of the lens and the buttons. Are they sharp? Is there any unwanted noise or jagged pixels? Since the files you receive are watermark-free and high-res, they should appear pristine. If you notice any imperfections, it may be an issue with your viewing software or scaling settings rather than the file itself.
Also, think about longevity. Trends in design shift, but classic, well-rendered 3D objects tend to remain relevant longer than stylized, trendy illustrations. Ask yourself if this camera icon aligns with your long-term brand identity. If your brand values precision, technology, and professionalism, a realistic 3D camera is an excellent choice. If your brand is more playful or abstract, you might need to adjust the surrounding design elements to balance the realism of the icon.
Ultimately, the Photo Camera with Lens 3d 11 is a powerful tool in your digital arsenal. By avoiding common mistakes regarding resolution, compatibility, and organization, you can ensure that this asset enhances your projects rather than complicating them. Whether you are a freelancer pitching to a new client or a hobbyist creating a personal blog, attention to these details demonstrates a level of professionalism that resonates with your audience. Thank you for visiting, and happy creating.