Sun and Moon: Integrating Celestial Aesthetics into Creative Workflows
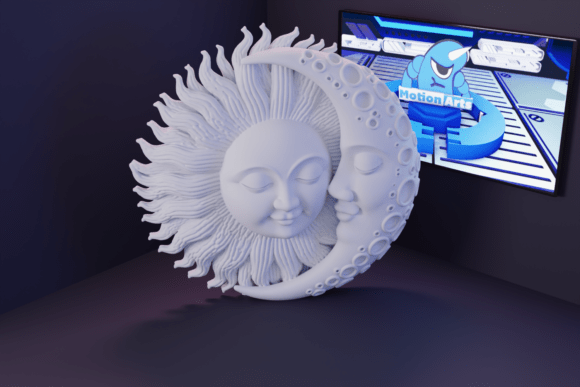
In the realm of digital fabrication and interior design, the intersection of symbolism and physical form creates objects that resonate on more than just a visual level. The Sun and Moon represent one of the most enduring dualities in human culture, symbolizing balance, harmony, and the cyclical nature of time. For creators, educators, and small business owners, incorporating these motifs into tangible assets is not merely an aesthetic choice but a strategic decision to enhance thematic cohesion in spaces and collections. Utilizing a high-quality STL model for 3D printing allows professionals to bridge the gap between conceptual design and physical reality, offering a versatile tool for decoration, educational aids, or artistic installations.
When integrating the Sun and Moon – STL Model for 3D Printing into your workflow, it is essential to view the file not just as a static object, but as a component of a broader creative process. Whether you are a marketer designing a brand activation, an educator preparing visual aids for astronomy lessons, or a hobbyist curating a home gallery, the preparation and execution phases determine the final quality of the output. This article explores how to effectively plan, print, and utilize this celestial pair to maximize both aesthetic impact and operational efficiency.
Strategic Placement in Creative and Business Projects
The utility of the Sun and Moon models extends beyond simple shelf decoration. In a professional context, these objects can serve as focal points in staged environments, props for photography, or tactile elements in workshop settings. Understanding where these items fit within a project lifecycle helps in planning their production and deployment.
For interior designers and stylists, the union of the two celestial bodies offers a narrative element that enhances spatial storytelling. Before beginning a print job, consider the end goal. Is the object intended for a high-traffic commercial space where durability is key, or a private collection where intricate detail is prioritized? This decision influences material selection and post-processing requirements. By aligning the production of the Sun and Moon with the broader design timeline, you ensure that the final pieces arrive ready for installation, avoiding last-minute rushes that compromise quality.
Educators and content creators can leverage these models to illustrate concepts of balance and duality. In this context, the workflow involves not just printing, but also integrating the objects into lesson plans or video content. The charm and elegant design of the model make it suitable for close-up shots or hands-on demonstrations, providing a tangible reference point for abstract ideas. Planning the print schedule around content creation deadlines ensures that high-quality visuals are available when needed for publishing or presentation.
Technical Preparation and File Optimization
Success in 3D printing begins long before the extruder heats up. The Sun and Moon – STL Model for 3D Printing is a digital asset that requires careful preprocessing to ensure faithful reproduction of its charming details. As with any AI-generated 3D design, reviewing the geometry in your slicer software is a critical step in quality control.
Start by importing the STL file into your preferred slicing platform. Examine the model for manifold errors or non-watertight meshes, which can occur in algorithmically generated designs. Most modern slicers will highlight these issues, allowing you to repair them before proceeding. Pay close attention to the orientation of the models. The sun and moon often feature spherical or semi-spherical elements that may require specific positioning to minimize overhangs and reduce the need for excessive support structures.
Support structures are a double-edged sword. While they enable the printing of complex geometries, they can leave marks on the surface that require tedious post-processing. For the Sun and Moon, aim to orient the models so that flat bases rest on the build plate, allowing curved surfaces to print with minimal support. If supports are necessary, use tree-style or organic supports if your slicer allows, as these are easier to remove and leave fewer artifacts on the delicate details of the design.
Material Selection and Printer Settings
The choice of material significantly impacts the final appearance and durability of the Sun and Moon prints. For decorative purposes where fine detail is paramount, PLA (Polylactic Acid) is often the best starting point. It offers excellent layer adhesion and minimal warping, making it ideal for capturing the elegant design features of the celestial bodies. Matte PLA variants can further enhance the aesthetic by hiding layer lines and giving the objects a stone-like or ceramic finish, which complements the timeless nature of the subject matter.
If the models are intended for outdoor use or environments with fluctuating temperatures, consider using PETG or ASA. These materials offer greater resistance to heat and UV radiation, ensuring that the Sun and Moon retain their structural integrity and color over time. However, note that these materials may require different printer settings, such as higher nozzle temperatures and enclosed print chambers, to prevent warping.
Layer height is another crucial variable. To capture the "charming details" mentioned in the model description, a layer height of 0.1mm to 0.16mm is recommended. While this increases print time, it results in smoother curves and sharper definition in the textures representing the sun’s rays and the moon’s craters. Balance this with infill density; a standard 15-20% infill is usually sufficient for decorative items, providing enough strength without wasting material or extending print times unnecessarily.
Post-Processing and Quality Assurance
Once the printing process is complete, the workflow shifts to post-processing. This stage is vital for achieving the polished look expected in professional collections or client deliverables. Begin by carefully removing support structures using flush cutters or precision knives. Work slowly around detailed areas to avoid damaging the model’s surface.
Sanding is the next step in refining the Sun and Moon models. Start with a coarse grit sandpaper to remove major layer lines and support marks, then progress to finer grits for a smooth finish. For those seeking a premium look, applying a primer filler can help eliminate minor imperfections and create a uniform surface for painting. If you choose to paint the models, consider using acrylics with dry-brushing techniques to highlight the textures of the sun and moon, enhancing the depth and realism of the design.
Quality control should be rigorous. Inspect each piece for symmetry, surface smoothness, and structural integrity. Ensure that the sun and moon complement each other in size and finish, maintaining the visual balance that defines the collection. Consistency across multiple prints is key, especially if you are producing sets for sale or large-scale installations.
Long-Term Integration and Maintenance
Integrating the Sun and Moon into your ongoing creative or business operations requires a mindset of continuous improvement. Document your successful print settings, including temperature, speed, and support configurations, to streamline future productions. This documentation serves as a valuable resource for scaling up operations or training team members.
Consider how these models interact with other elements in your ecosystem. Can they be combined with lighting elements to create illuminated displays? Could they be part of a larger series of celestial-themed objects? By viewing the Sun and Moon – STL Model for 3D Printing as a modular component rather than a standalone item, you unlock new possibilities for innovation and product development.
Finally, remember the disclaimer regarding digital models: actual printed results may vary depending on your specific hardware and materials. Embrace this variability as part of the creative process, but strive for consistency through meticulous testing and adjustment. By following these practical steps, you can effectively bring balance and harmony to your collection, leveraging the Sun and Moon to enhance your projects with elegance and meaning.